OpenStack Instance Launch Guide
This document provides comprehensive instructions for creating and launching OpenStack instances, including instances with Universal Software Radio Peripheral (USRP) access using the Command-Line Interface (CLI), and generic compute virtual machines (VMs) via the OpenStack dashboard.
Keywords: USRP, OpenStack, CLI, Dashboard, Compute VM, Cloud Computing
Note
Each USRP can only be connected to one instance at a time.
Access to create an instance with a USRP network must be granted by an OpenStack administrator.
This guide is intended for users on Linux, macOS, and Windows platforms.
Understanding Storage Options in OpenStack
When launching instances in OpenStack, it’s crucial to understand the available storage options and how they impact your data.
Instance Store
Local Storage: Data is stored on the same physical server that hosts the instance.
Volatility: If the server’s disk fails, all data stored on the instance is lost.
Performance: Offers higher read and write throughput due to proximity to the instance.
Use Cases: Suitable for workloads where data persistence is not critical.
Block Storage (Cinder)
Separate Storage: Data is stored on a separate storage server, similar to Amazon Elastic Block Store (EBS).
Persistence: Provides data persistence even if the instance or its host server fails.
Performance: Slightly lower read and write throughput compared to instance store.
Recommendation: Ideal for most use cases to ensure data safety.
Choosing Storage Type:
When creating an instance, you can choose between these storage types by setting the “Create New Volume” option:
Create New Volume: No
The instance uses Instance Store.
Data is stored on the server hosting the instance.
Risk of data loss if the server’s disk fails.
Create New Volume: Yes
The instance uses Block Storage (Cinder).
Data is stored on a separate storage server.
Provides data persistence and safety.
Important
Recommendation: Set “Create New Volume” to “Yes” to ensure your data is safe.
Volume Deletion Options:
When “Create New Volume” is set to “Yes”, you can specify whether the volume should be deleted when the instance is deleted:
Delete Volume on Instance Delete: Yes
The volume will be deleted when the instance is deleted.
Delete Volume on Instance Delete: No
The volume will persist after the instance is deleted.
You can attach this volume to another instance or create a snapshot.
Creating an Instance Using the OpenStack Dashboard
Follow these steps to create an instance using the OpenStack dashboard with block storage.
Logging into the OpenStack Dashboard
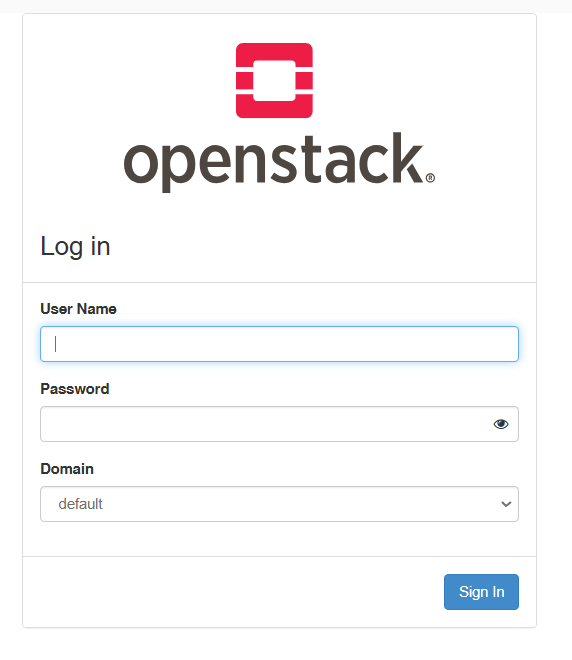
Access the Portal:
Navigate to the OpenStack portal: Link.
Login:
Enter your credentials and click Sign In.
Creating a Volume
Follow these steps to create a volume before launching your instance.
Step 1: Navigate to Volumes
Go to Project > Volumes > Volumes.
Click Create Volume.
Step 2: Configure Volume Details
Volume Name: Enter a unique name for your volume.
Description: (Optional) Provide a description for your volume.
Source: Select Image and then in Use image as a source select ubuntu-22-ServerImage (5.4 GB).
Size (GB): Specify the size of the volume in GB (must meet or exceed the image’s minimum size).
Step 3: Finalize Volume Creation
Click Create Volume to provision the volume.
Note
Ensure that the volume size meets the requirements of your selected image and instance flavor.
Creating a Compute Instance
Navigate to Launch Instance:
Go to Project > Compute > Instances.
Click Launch Instance.
Configure Instance Details:
Details Tab:
Instance Name: Enter a unique name for your instance.
Availability Zone: Select compute.
Source Tab:
Select Boot Source: Choose Image.
Create New Volume: Set to Yes (recommended).
Volume Size: Specify the size in GB (must meet or exceed the image’s minimum size).
Delete Volume on Instance Delete: Choose Yes or No based on your preference.
Flavor Tab:
Select a flavor that meets your requirements.
Note: The flavor’s disk size must match or exceed the Volume Size specified.
Networks Tab:
Select the appropriate network(s) for your instance.
Launch the Instance:
Click Launch Instance to provision the instance.
Note
If you encounter a “VolumeSizeExceedsAvailableQuota” error, ensure you have sufficient quota for the volume size. You may need to reduce the volume size or request additional quota from the administrator.
Creating a GPU Instance
Navigate to Launch Instance:
Go to Project > Compute > Instances.
Click Launch Instance.
Configure Instance Details:
Details Tab:
Instance Name: Enter a name for your GPU instance.
Availability Zone: Select gpu.
Note: GPU access must be granted by an administrator.
Source Tab:
Select Boot Source: Choose Image.
Create New Volume: Set to Yes (recommended).
Volume Size: Specify the size in GB (must meet or exceed the image’s minimum size).
Delete Volume on Instance Delete: Choose Yes or No based on your preference.
Flavor Tab:
Select a GPU flavor that includes GPU resources.
Note: GPU flavors are assigned by the administrator. Contact them if not visible.
Networks Tab:
Select the appropriate network(s).
Launch the Instance:
Click Launch Instance to provision the GPU instance.
Note
If you encounter errors during GPU instance creation, ensure you have GPU access and sufficient quotas.
Transferring Volumes to Other Users
Transferring volumes allows you to share data or hand over work to another user.
Transferring a Volume You No Longer Need
Create a Transfer Request:
Navigate to Project > Volumes > Volumes.
Find the volume to transfer.
Click Actions > Create Transfer.
Provide a Transfer Name and confirm.
You will receive a Transfer ID and Authorization Key.
Provide Transfer Details to Recipient:
Share the Transfer ID and Authorization Key with the recipient securely.
Recipient Accepts the Transfer:
Recipient navigates to Project > Volumes > Volumes.
Click Accept Transfer.
Enter the Transfer ID and Authorization Key.
The volume is now in the recipient’s project.
Note
After transfer, you lose access to the volume.
Creating Instances via the Command-Line Interface (CLI)
Creating instances via the CLI allows for advanced configurations, especially for instances requiring special resources like USRP devices.
Prerequisites
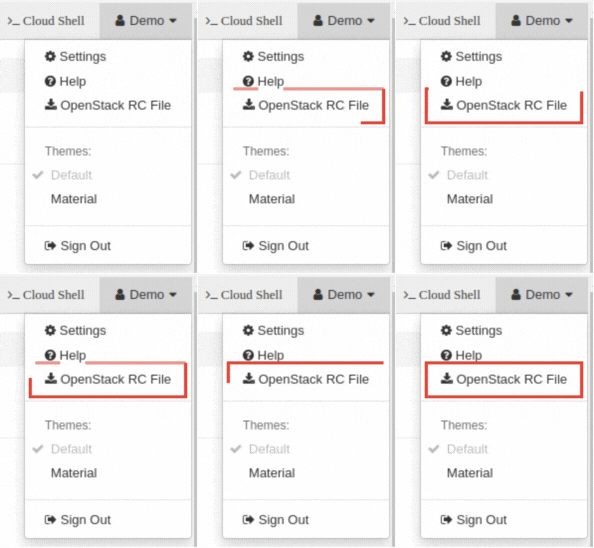
Download Your OpenStack RC File:
Log in to the OpenStack portal: Link.
Click your username at the top-right corner and select Download OpenStack RC File.
Install Necessary Dependencies:
For Linux/macOS:
sudo apt update
sudo apt install -y python3-pip python3-dev
pip3 install --upgrade pip
pip3 install python-openstackclient
For Windows:
Install Python 3:
Download from Link.
During installation, check “Add Python to PATH”.
Verify Installation:
python --version
pip --version
Upgrade pip:
python -m pip install --upgrade pip
Install OpenStack Client:
pip install python-openstackclient
Source the OpenStack RC File:
Navigate to the directory containing the RC file.
Source the file and enter your password when prompted:
source <your_rc_file>.sh
Note
Images now have a dedicated username and password. You can change the password using the passwd command inside the instance.
CLI Instructions for Radio Instances
For radio instances requiring USRP access, use the following command:
openstack --insecure server create
--flavor <flavor_name>
--image <image_name>
--nic port-id=$(openstack --insecure port list | grep USRP-<usrp_number> | awk '{print $2}')
--nic net-id=<internal_network_id>
--availability-zone radio <instance_name>
Parameters:
<flavor_name>: The desired flavor.<image_name>: The image to boot from.<usrp_number>: Your assigned USRP number.<internal_network_id>: Your internal network ID.<instance_name>: Name for your instance.
Important
Ensure you have access to the USRP port granted by the administrator.
Replace placeholders with actual values.
The default username is ubuntu and the password is CCI@2024. You can change the password using the passwd command inside the instance.
Configuring the Network Interface Inside the Instance
After instance creation, you may need to configure network interfaces, especially for radio instances.
Configuring Network Interfaces for Radio Instances
Radio instances may have an additional network interface connected to the USRP device.
Identify Network Interfaces:
ip aFind the USRP interface (e.g.,
ens5,ens7).If the interface is down, it needs configuration.
Edit Netplan Configuration:
Open the netplan configuration file:
sudo nano /etc/netplan/01-netcfg.yaml
Update the interface name and configuration:
network:
  version: 2
  ethernets:
    ens5:
      dhcp4: false
      addresses:
        - 192.168.<USRP_SUBNET>.<INSTANCE_IP>/24
      mtu: 9000
Replace
ens5with your interface name.Replace
<USRP_SUBNET>with your USRP subnet number.Replace
<INSTANCE_IP>with an IP between4and10.
Important
Use spaces, not tabs, in YAML files.
Apply Network Configuration:
sudo netplan apply
Verify Connectivity:
Check interface status:
ip aPing the USRP device:
ping 192.168.<USRP_SUBNET>.2
Find the USRP device:
uhd_find_devices --args="addr=192.168.<USRP_SUBNET>.2"
Create OpenStack Network
This section provides instructions for creating a network in OpenStack.
Step 1: Log in to the OpenStack Dashboard
Open a web browser and navigate to the OpenStack dashboard URL.
Enter your Username, Password, and Domain Name.
Click Sign In.
Step 2: Navigate to the Network Section
In the left-hand navigation pane, under the Project section, click on Network, then select Networks.
Step 3: Create a New Network
Click the Create Network button.
In the Create Network dialog, provide the following details:
Network Name: Enter a descriptive name for the network (e.g.,
Internal-Network-Username).Description: (Optional) Provide a brief description.
Admin State: Ensure it is set to Up.
Create Subnet: Leave this option checked if you wish to create a subnet now.
Click Next to proceed to the subnet configuration.
Step 4: Configure the Subnet
In the Subnet tab, provide the following details:
Subnet Name: Enter a name for the subnet (e.g.,
Internal-Subnet-Username).Network Address (CIDR): Enter the IP address range in CIDR notation (e.g.,
10.0.0.0/24).IP Version: Select IPv4 or IPv6 based on your requirements.
Gateway IP: (Optional) Enter the gateway IP address for the subnet.
Disable Gateway: Check this option if you do not require a gateway.
Allocation Pools: (Optional) Define a range of IP addresses to allocate from.
DNS Name Servers: (Optional) Enter DNS nameservers if required.
Host Routes: (Optional) Define any host routes for the subnet.
Click Create to finalize the network and subnet creation.
Step 5: Create a Router (Optional)
If you need to connect your network to an external network or provide internet access, you can create a router:
Navigate to Project > Network > Routers.
Click the Create Router button.
In the Create Router dialog, provide the following details:
Router Name: Enter a name for the router (e.g.,
Internal-Router-Username).Description: (Optional) Provide a brief description.
Admin State: Ensure it is set to Up.
External Network: Select the external network to which the router will connect.
Click Create to create the router.
Attach the Subnet to the Router
In the Routers panel, click on the router you just created to view its details.
Navigate to the Interfaces tab.
Click Add Interface.
In the Add Interface dialog:
Subnet: Select the subnet you created earlier.
IP Address: (Optional) Specify an IP address for the interface.
Click Submit to attach the subnet to the router.
Step 6: Verify Network Configuration
Return to the Networks tab and confirm that your new network and subnet are listed.
Ensure that the router is correctly connected to both your internal network and the external network (if applicable).
For a step-by-step walkthrough, watch the tutorial video below:
Verifying Security Groups in OpenStack
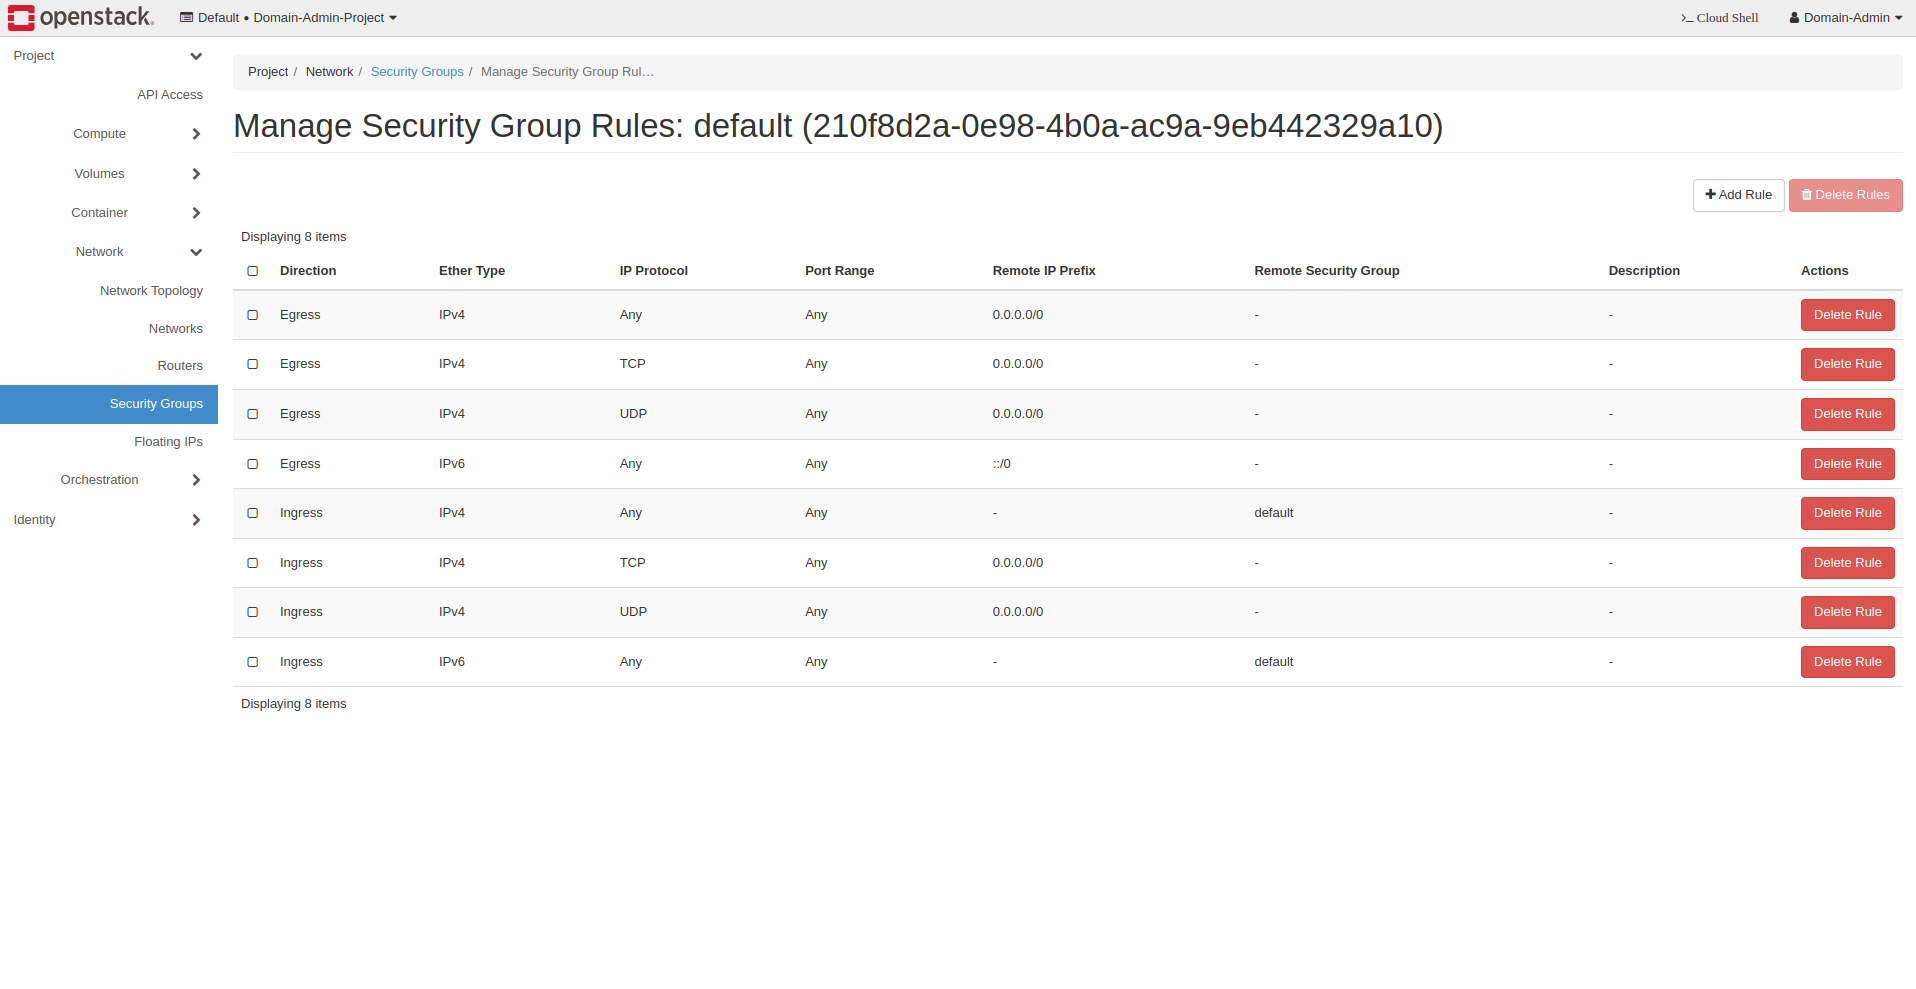
Proper security group configuration is essential for network connectivity.
Navigate to Security Groups:
Go to Project > Network > Security Groups.
Select Your Security Group:
Click on the security group assigned to your instances.
Review Security Group Rules:
Ensure the following Ingress (incoming) and Egress (outgoing) rules are present:
Protocols: TCP and UDP
Direction: Ingress and Egress
Port Range: Specify as needed (e.g., allow all or specific ports)
Modify Rules if Necessary:
To add or edit rules, click Add Rule.
Configure the protocol, direction, and port range.
Save your changes.
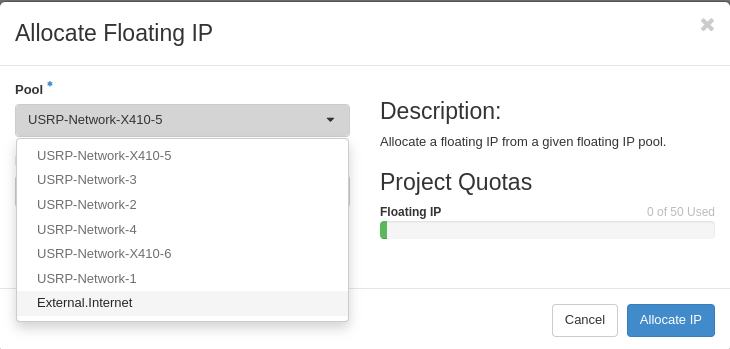
Creating and Associating a Floating IP in OpenStack
Assign a public IP to your instance for external access.
Navigate to Floating IPs:
Go to Project > Network > Floating IPs.
Allocate a Floating IP:
Click Allocate IP to Project.
Select the External Network (provides public IPs).
Confirm the allocation.
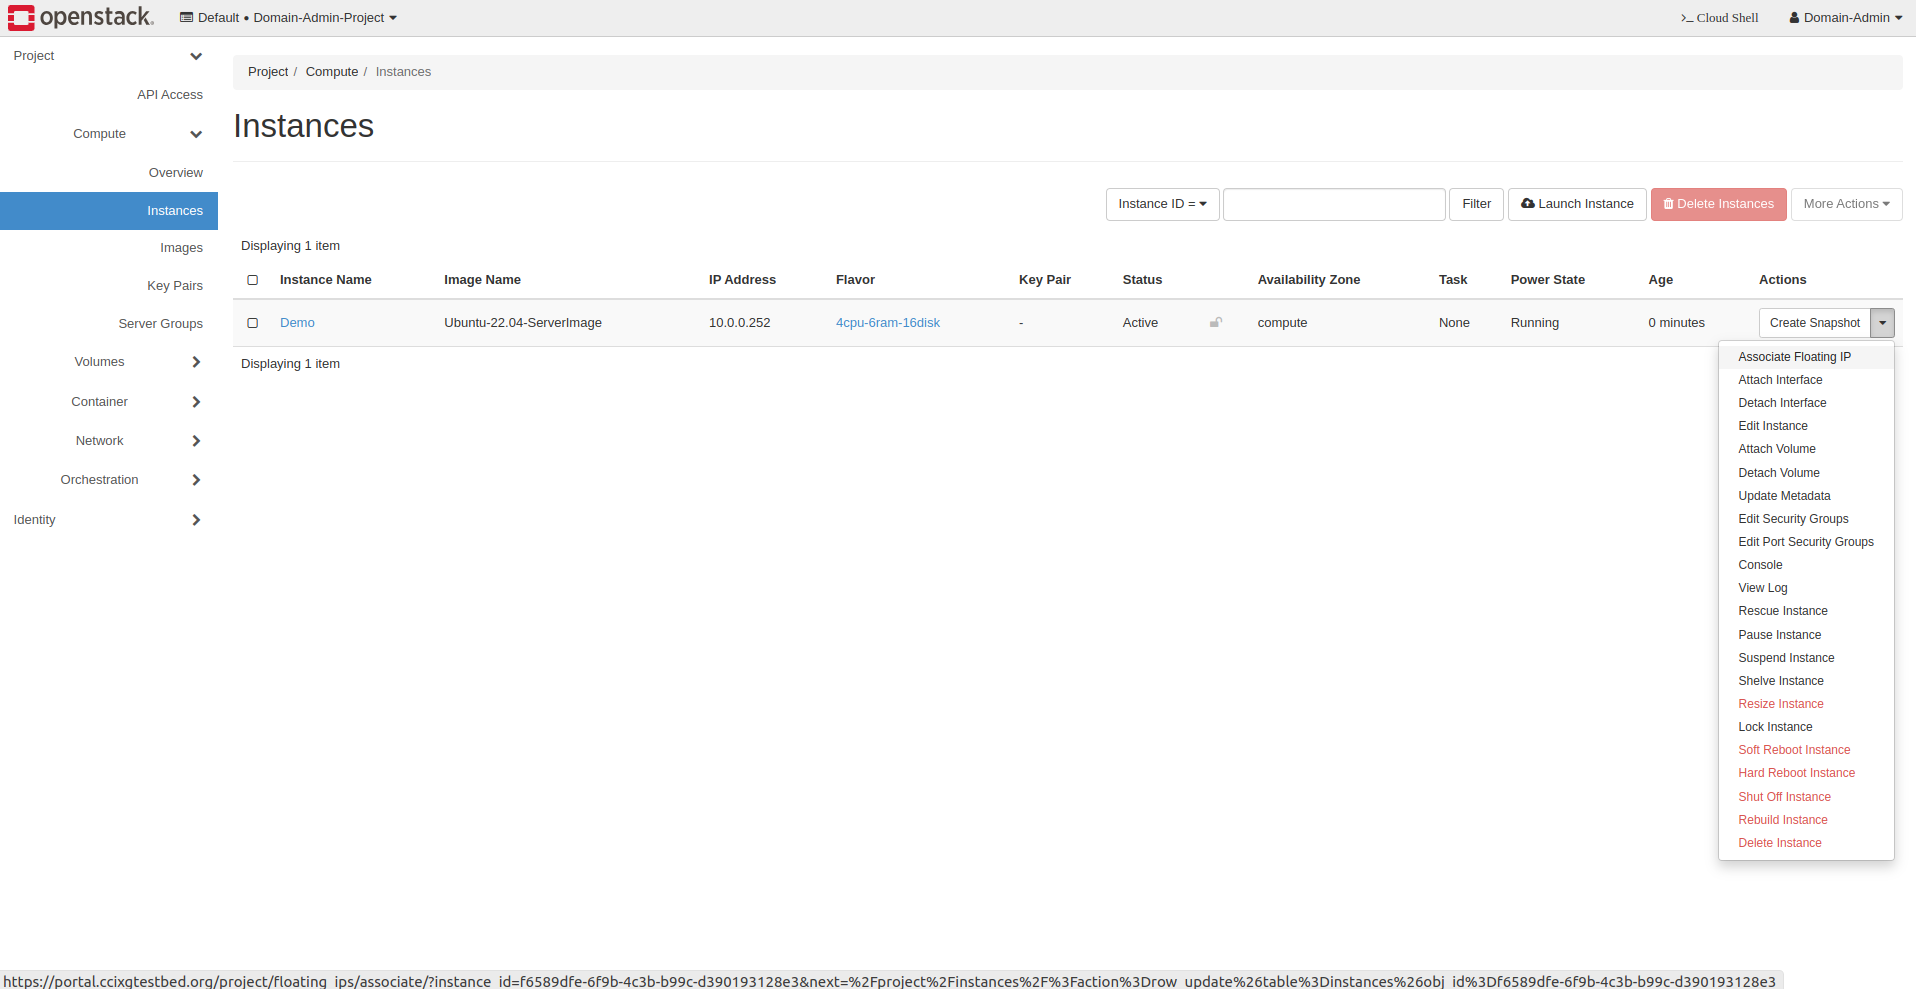
Associate the Floating IP:
Click Associate next to the allocated IP.
Choose the internal port (network interface) of your instance.
Confirm the association.
Verify the Association:
The floating IP should now be linked to your instance.
Ensure the floating IP is within the correct IP range (e.g.,
172.167.x.x).
Important Notes and Best Practices
Data Safety: Use block storage by setting “Create New Volume” to “Yes”.
Volume Persistence: To retain data after instance deletion, set “Delete Volume on Instance Delete” to “No”.
Flavor and Volume Size: The flavor’s disk size must meet or exceed the specified volume size.
Transferring Volumes: Use volume transfers and snapshots to share data without losing access.
GPU Instances: GPU resources are limited and require administrator approval.
Radio Instances: Ensure you have necessary permissions and follow CLI instructions carefully.
Network Configuration: Exercise caution when editing network configurations to avoid connectivity issues.
Security Groups: Properly configure security groups to allow necessary traffic.
Troubleshooting: Attempt to resolve issues using documentation and available resources before contacting support.
Contacting Administrators: For persistent issues, reach out to the administrator at cci.xg.testbed.admin@cyberinitiative.org.
Conclusion
This guide provides detailed instructions for launching OpenStack instances, understanding storage options, transferring volumes, and following best practices. By adhering to these guidelines, you can effectively utilize the OpenStack platform to meet your computing requirements.
Contact Information
If you encounter any issues with the OpenStack dashboard, login credentials, or network access:
Raise a Ticket: Submit a ticket in Redmine.
Email Support: Contact the administrator at cci.xg.testbed.admin@cyberinitiative.org.